Hey! Welcome to my very first blog post! I'm really excited to share with you how I made this inexpensive spring wreath!
It all started when my mom and I were talking about DIY projects. She was explaining how she would love to get a wreath that could hang on our front door but didn't feel like making one, however buying one that was already made was a ridiculous price. Naturally I got all excited and said "Mom, lets go to hobby lobby, I'll make you one!"
It all started when my mom and I were talking about DIY projects. She was explaining how she would love to get a wreath that could hang on our front door but didn't feel like making one, however buying one that was already made was a ridiculous price. Naturally I got all excited and said "Mom, lets go to hobby lobby, I'll make you one!"

We made our way into the store, and once we were surrounded by their entire flower selection, it was just a matter of picking a color scheme. I went with the lighter shades of purple and pink, some yellows and white to help break up some of the bright colors. We then grabbed this amazing wicker wreath to be the base for everything.
The best part about this shopping trip was all of these flowers were 50% off! Bringing our total to $37.00. The cheapest wreath we saw made in the store started at $50 and went all the way up to $100!! Thats why I'm so excited to show you, by just taking an hour out of your day, you can save a ton of money and make this beautiful decorative wreath this spring!
The best part about this shopping trip was all of these flowers were 50% off! Bringing our total to $37.00. The cheapest wreath we saw made in the store started at $50 and went all the way up to $100!! Thats why I'm so excited to show you, by just taking an hour out of your day, you can save a ton of money and make this beautiful decorative wreath this spring!
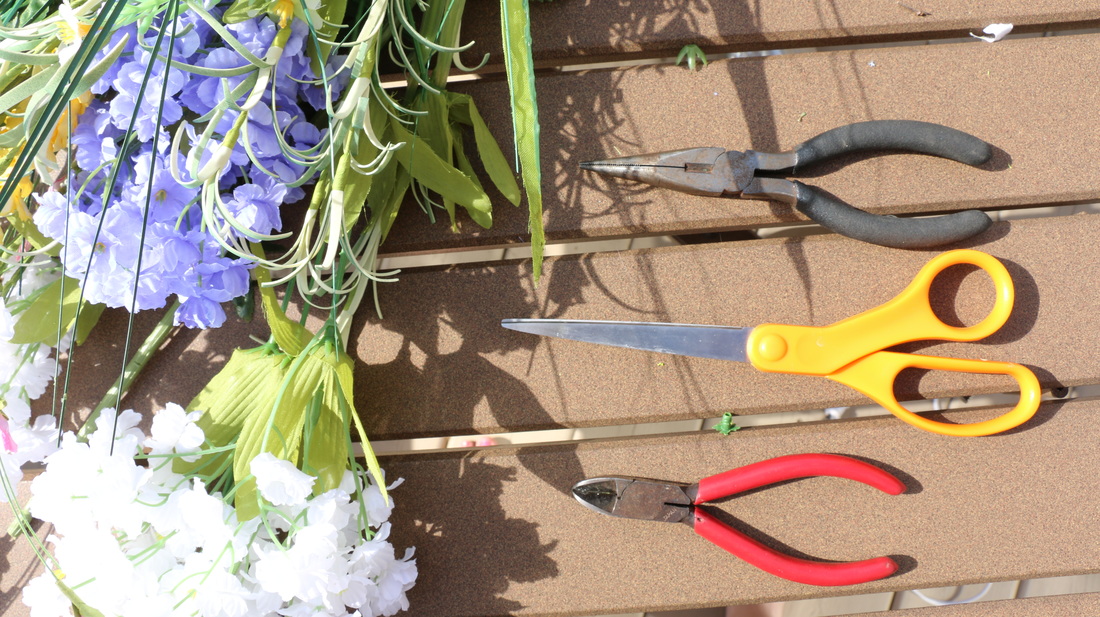
Step 1: This first step it super easy..just make sure you have some scissors, and wire cutters. Any type will do, and I found the wire cutters worked the best so maybe just forget the scissors!
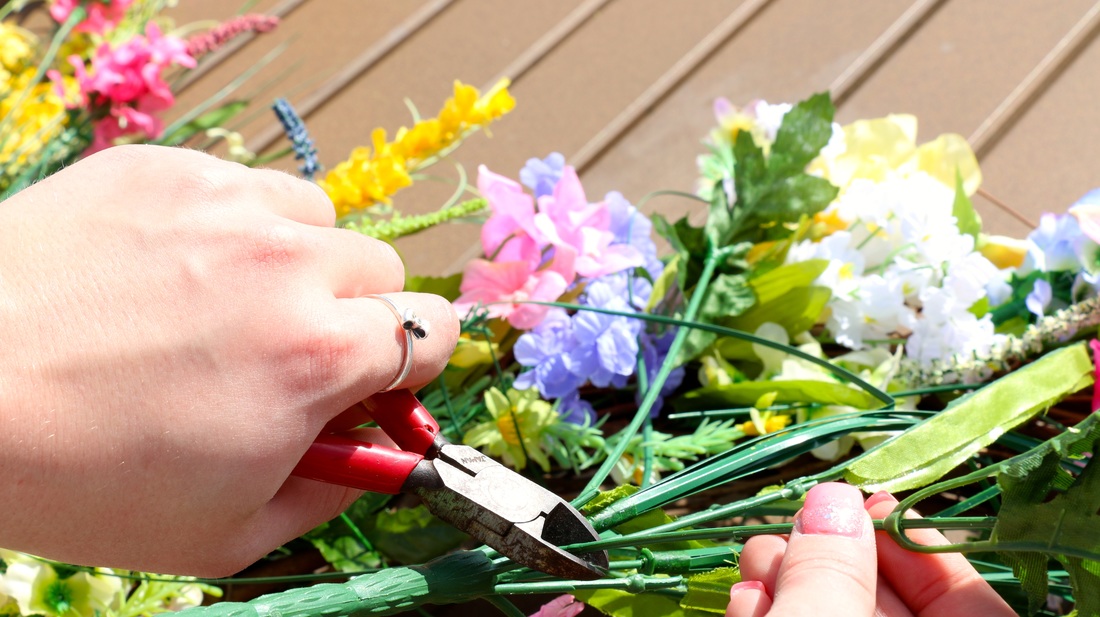
Step 2: Begin by cutting the stem of your first bunch of flowers. You'll understand what I mean once you're actually doing it. Each bunch of flowers have individual groups, so can cut them at the base, just before it turns into the main stem.
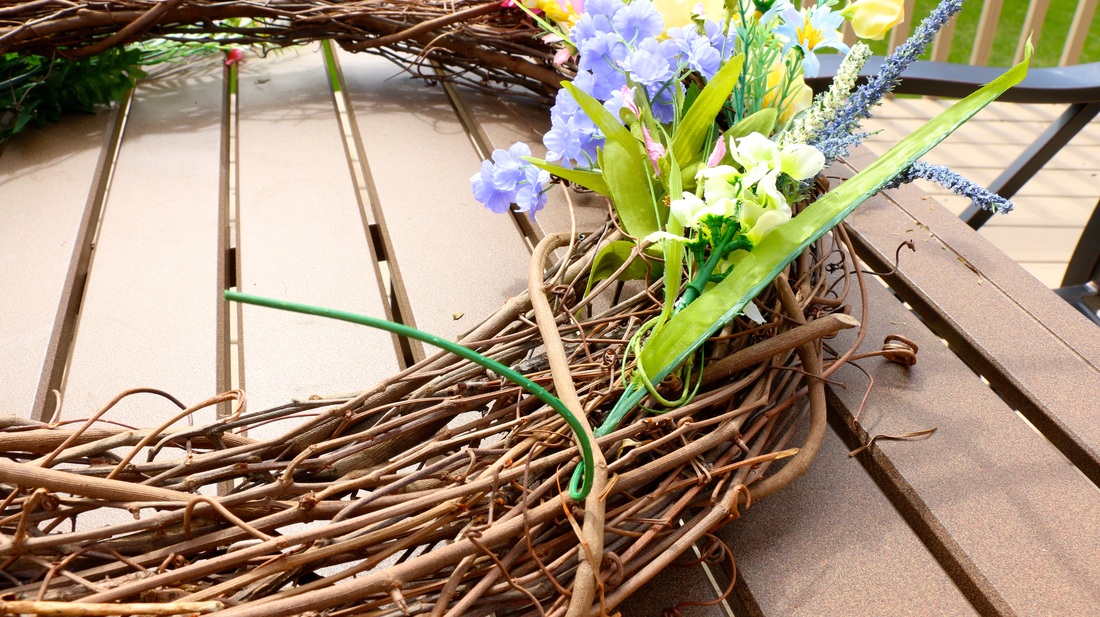
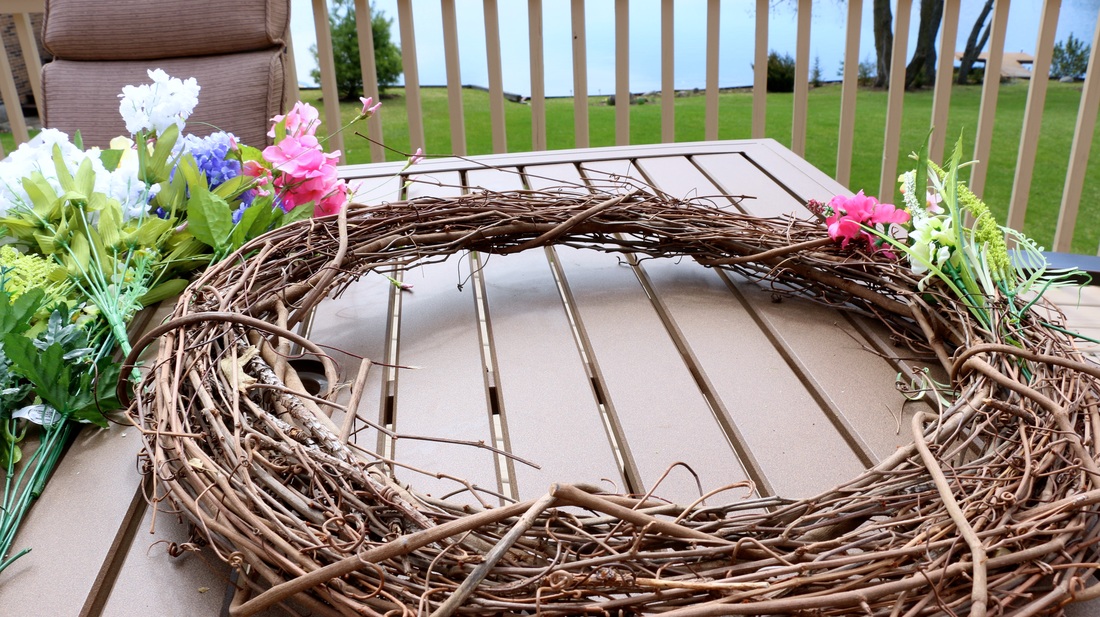

Step 3: All you have to do is start alternating between each group of flowers, cutting at the stem to get a single flower, and arranging it how you like. I found the more I filled the wreath I developed a theme and pattern. Like I said in the beginning this was the easiest little do it yourself, from here on it was just about filling up the entire wreath.
 RSS Feed
